Once you've downloaded the zip file and extracted it, a few one-time steps need to happen before you can start using it.
Step 1: Get familiar with your computer's console
If you're on a Mac:
Open a Finder window and head to your Applications -> Utilities directory. Look for the program called "Terminal" and open it.
If you use Windows:
Press Windows+R to open the "Run" box. Type "cmd" and then click OK to open a Command Prompt.
If you use Linux:
You probably already know how to do this 😀
Step 2: Make sure you have Node.js installed on your computer
Now you need to install Node.js, which is the environment Maizzle and the Creator Email Template Pack run in.
To download and install, head here and follow the instructions.
Step 3: Install the required dependencies
In the terminal / command prompt you opened in the first step, find the directory that you unzipped the download to and change to it.
If you extracted it from your Desktop, you'll want to type in:
cd ~/Desktop/creator-email-template-pack-main
Hit enter.
To install the dependencies, type in npm install and hit enter. Assuming you've installed Node.js, you should see some output and the text 'added XXX packages...'
Don't worry if you see 'deprecated' language.
Now you'll need to download Maizzle. To do this, enter into your terminal / command prompt:
sudo npm install -g @maizzle/cli
Close and reopen your console for the new "maizzle" program to take effect.
If you run into any issues, this article might help: https://medium.com/@jagatjyoti.1si13cs040/npm-g-install-npm-package-not-working-as-desired-why-why-why-19795abf0b59
Step 4: Download a code editor
I recommend Visual Studio Code.
Once you've installed it, go to "File -> Open" and choose the directory that you extracted the Pack into.
Step 5: Copy a few files
Currently the pack includes 3 template files and a theme file that you'll likely be messing with.
To ensure that future updates of the pack (new templates, widgets, etc.) don't end up overwriting your work, you're going to want to duplicate the following files and rename them.
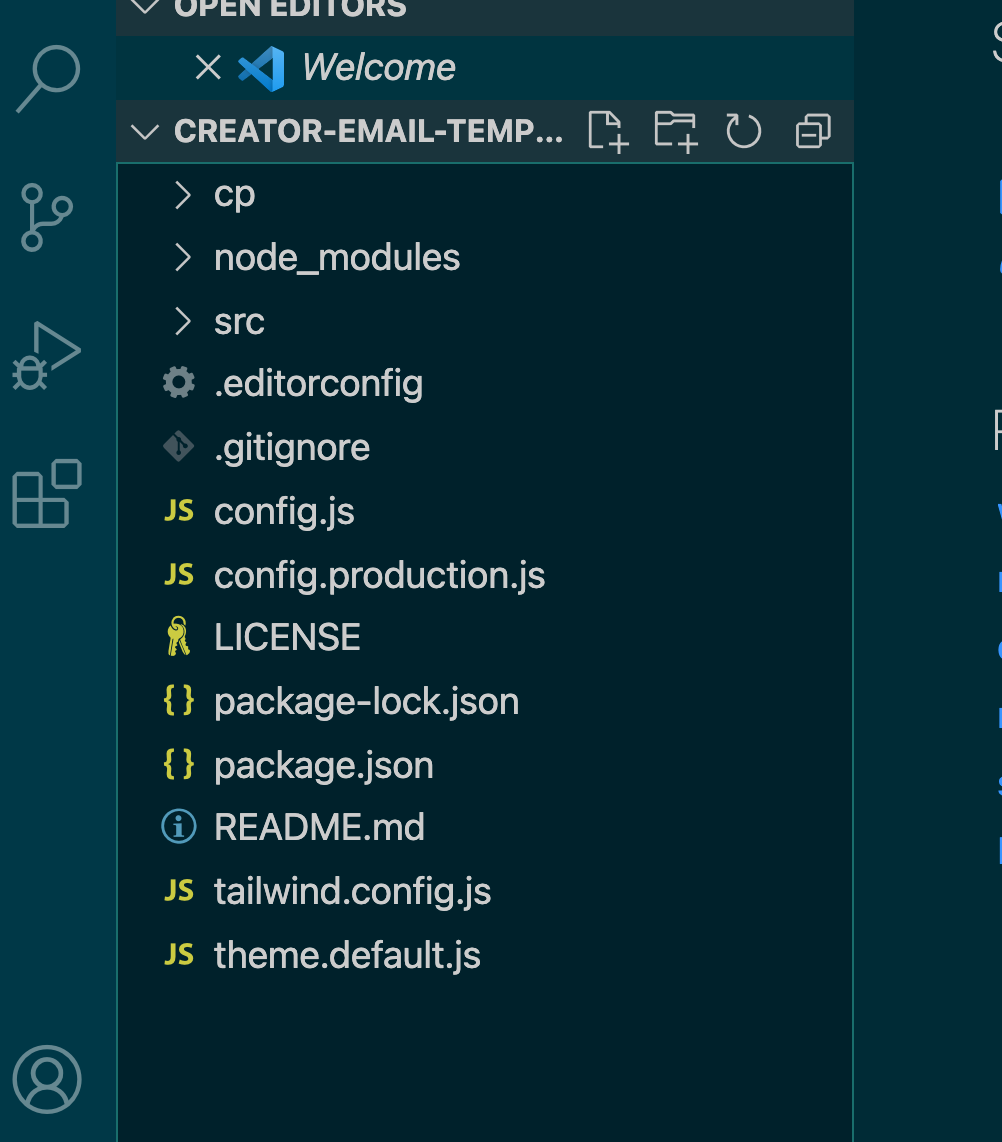
On the left hand side of Visual Studio Code you'll see a file browser.
It should look like this:
 Right click on theme.default.js and click "copy"
Now right click below it (in the empty space) and click "paste".
You should now see a new file called theme.default copy.js
Right click on the new file and rename it to theme.js
Find the > src folder in the file browser, click on it to expand it, find and click on (expand) the > templates folder, and then copy and paste the three files inside (newsletter-with-block.default.html, newsletter.default.html, and plain.default.html).
Rename each to:
Step 6: Test it out!
Now type into the terminal / command prompt:
maizzle serve
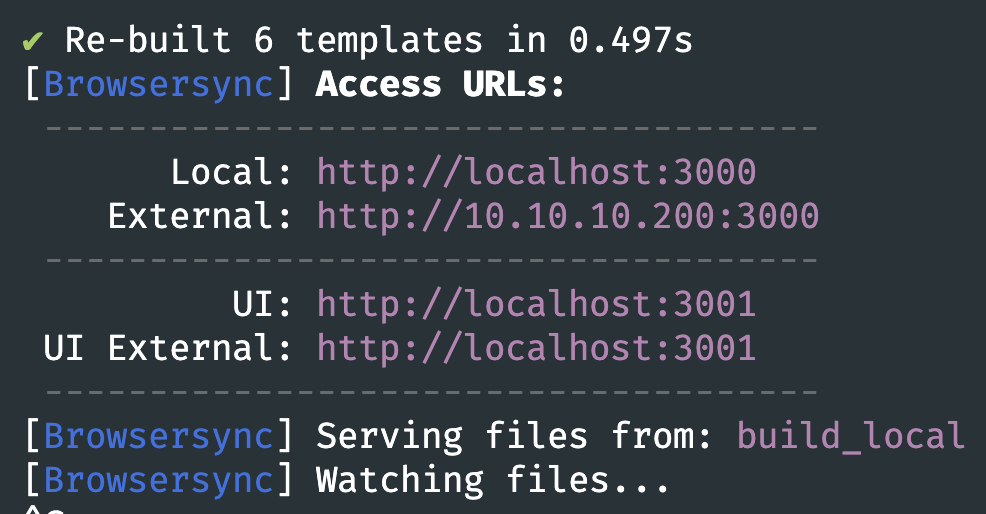
You should now see the following your terminal / command prompt:
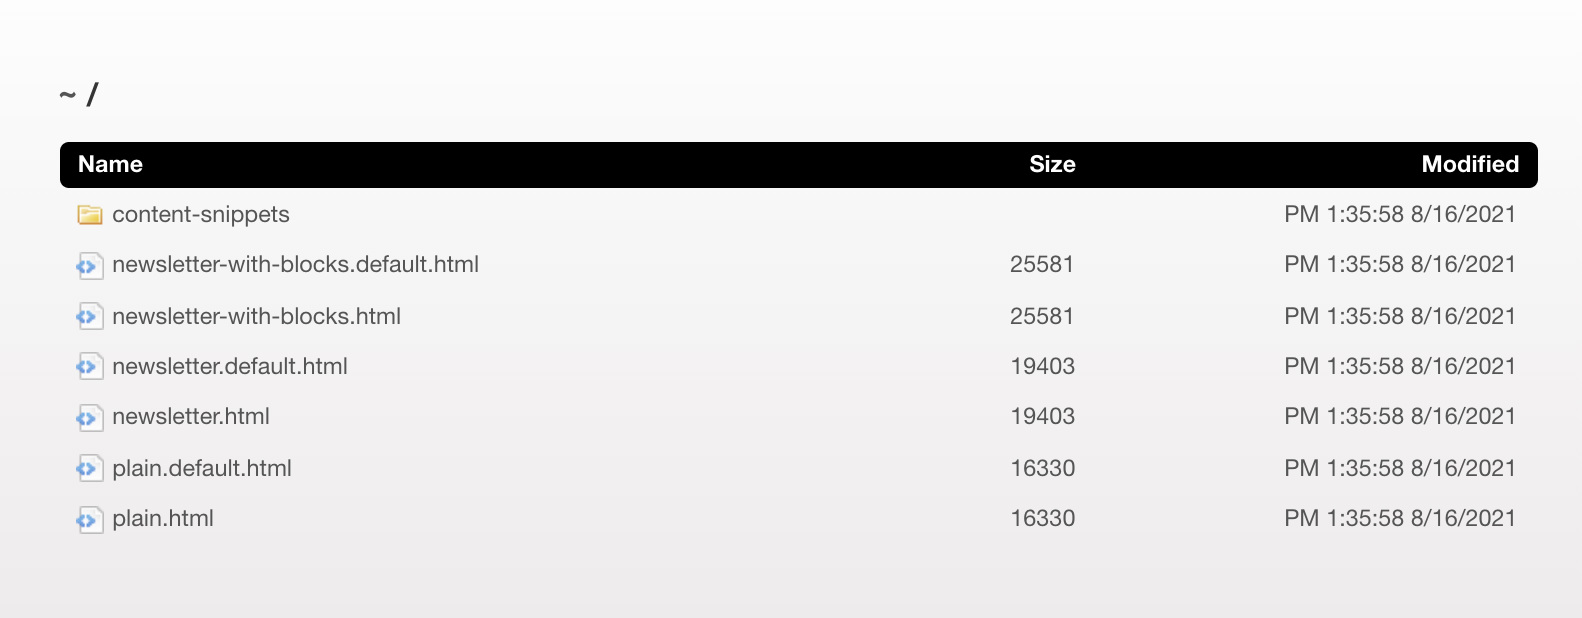
 And if you go to http://localhost:3000 in your web browser, you'll see your templates and widgets:
 Click on "newsletter-with-blocks.html" to make sure everything looks as expected.
Now it's time to customise!
Troubleshooting
Can't find "maizzle"
If you're getting an error about maizzle not being found after installing it with sudo npm install -g @maizzle/cli, try this instead:
First make sure you're in the Pack's directory.
Then install Maizzle directly into the Pack's directory with the following code. (Paste and hit enter)
npm install @maizzle/cli
This time we're not including the -g
Once that's done, paste the following and hit enter:
ln -s ./node_modules/@maizzle/cli/bin/maizzle maizzle
This should now work.
Rather than typing in maizzle serve you'll now instead type in ./maizzle serve. Likewise, instead of maizzle build production you'll now type in ./maizzle build production